I’ve been running XenServer 5.X at home for a test lab for a couple of years. It’s been stable and easy to use. Upgrading to XenServer 6.0 has been on my to-do list, and I finally got around to it this weekend. On my old clunky hardware, I had a few issues, so here’s some notes on what I did…
Upgrade Issues
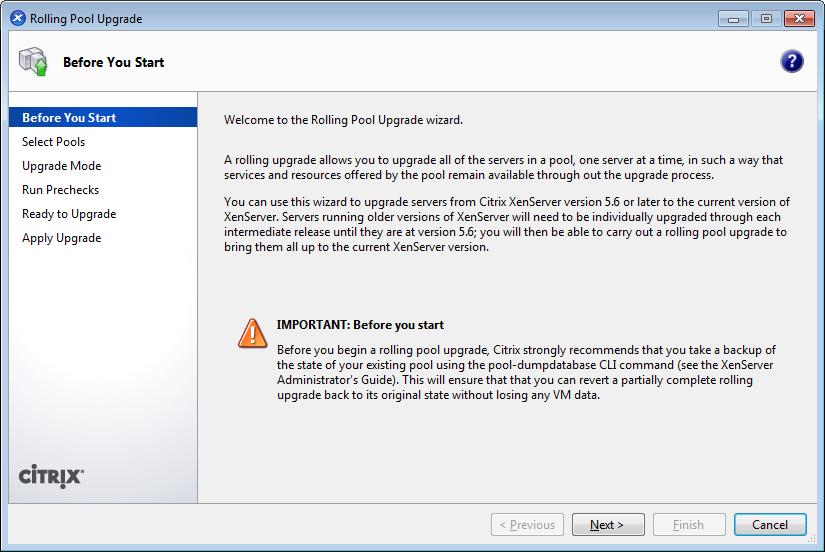
First of all, get XenCenter 6, the management GUI for XenServer. Use 6.0 to do the upgrade with. One of the features is “rolling pool upgrade” which manages the upgrade process for you.
One of the fundamental choice you have to make is “Upgrade Mode” – Automatic or Manual. Automatic requires a network place to stage the install files. Manual means “burn a CD”. I had a NFS location available, so I fiddled with trying to use this unsuccessfully. I finally burned a CD. (Later I stumbled across a clue… This network location should *NOT* contain the .iso you download, it’s supposed to be the unpacked files from the .iso. I hadn’t done that. If you did, it’d probably be fine.)
The basic process from the rolling pool upgrade is to stop the VMs on the master, reboot, upgrade the master, stop the VMs on the next pool member, reboot, upgrade the member, lather, rinse, repeat. If you choose Manual like I did, the it’ll prompt you to insert the CD you burned at the appropriate times.
My pool master upgraded without a problem. This is on a Dell AMD T105 I got on E-Bay. This has been a solid, if boring server. (I’d guess this is actually on the Hardware Compatibility List, that’s why I had no problems…)
My second pool member is some old AMD based PC I cobbled together from parts on hand. This one is decidedly *NOT* on the HCL, and it showed.
(Warning – crappy action pictures follow. Sorry, I’m not a real photographer.)
The first part of the installer is fine. (Fine = I can type at the prompt.)
As all the “crap” scrolls by, notice that it seems to not be able to use the PS/2 controller it finds (“Failed to obtain physical IRQ 12”, etc.), which means that it has issues with the mouse and keyboard. It hangs an inordinately long time at the “detecting hardware” line, but does eventually move past it.
The symptom I had on this old clunky non-HCL hardware is that I can’t type once the text installer starts.
To get past this, I restarted it, and then hit F2 at the first screen. This will show all the options available. Type safe and continue. The installer starts fine, and completes fine.
After the installer is complete, and the server reboots the first time the new install hangs forever on a white Citrix Xenserver screen. You never get the usual progress bar at the bottom. It just hangs here, white, forever (I dubbed this the “white screen of hang”.) I guess the actual install pukes on the bad hardware too.
After much googling, I found others that had used the kernel option noapic to get past this. You can manually pass this option to XenServer at boot time as follows.
At boot time, quickly type menu at the first boot: prompt. (You don’t have much time…)
XenServer is trying to boot ‘xe’, so (quickly!) arrow down to xe. Hit tab.
Now you can add the option ‘noapic’. Arrow back, back, back until you get on the first line, right after …xen.gz and add the word noapic.
Yay! the server boot normally! Whatever noapic does, it does the trick.
Note! This is a one time trick! Every time you boot the XenServer you have to use noapic. The next time it boots, you’ll get the “white screen of hang” again unless you interrupt the boot again and pass it noapic.
This is not fun, especially since XenCenter will now warn you there are 4 updates that need to be applied, and every one of those needs 2 reboots, 8 reboots total.
To fix it (hopefully) permanently, edit the /boot/extlinux.conf and add the noapic entry in the same spot, under the xe entry.
Change the xe stanza that looks like:
label xe
 # XenServer
 kernel mboot.c32
 append /boot/xen.gz dom0_mem=752M lowmem... <snip>
And add the nopic as so.
label xe
 # XenServer
 kernel mboot.c32
 append /boot/xen.gz noapic dom0_mem=752M lowmem... <snip>
This will allow XenServer to boot every time with no fiddling. (There may be additional places noapic should go, but this location worked for me.)
I then applied the updates XenCenter recommended, and I could reboot at will without typing.
It’s possible that future updates will overwrite this, so if your funky XenServer gets the “white screen of hang”, you’ll have to make this change again.
XenServer Tool Issues
On Windows VM’s, after the XenServer upgrade, XenCenter will complain that Tools is out of date. You need to install the latest tools. This isn’t a big deal, but I fiddled around with it for an inordinately long time, since I didn’t bother to read the instructions.
First of all, on my Windows 7 and Server 2008 R2 VMs, I didn’t have .Net 4.0. This is required. Get .Net 4.0 and install it. This may require a reboot of the VM. I downloaded the .Net 4.0 installer from Microsoft, right clicked it, and said “Run as administrator”. (Even though I was already administrator, the installer seems happier doing it this way.) After this installs, run Windows update again, get all of the .Net updates, reboot as needed, run Windows update again, lather, rinse, repeat, until your .Net installation is fully patched.
Then, from XenCenter, highlight the VM and pick VM from the top bar, Install XenServer tools. All this really does is mount the installer stuff as a CD in the VM. Autorun will probably prompt you to run the installer. Don’t do this. Right click on the CD and select Open. Right click on the installer and pick “Run as administrator” (even if you are one.) This will require a VM reboot again.
I don’t know if I just wasn’t holding my mouth right or what, but I went around and around with installing .Net 4.0 and XenServer tools. I installed both, rebooted, XenCenter would report “XenServer Tools not installed”, try again, reboot, lather, rinse, repeat. Eventually, it will install, and XenCenter will be happy with your VMs (happy = properly report memory and disk usage, and not complain about Tools). This was especially true with the Server 2008 R2 VMs. I fiddled with their network adapters extensively. I disabled, enabled, removed device in Device Manager and rescanned, etc, etc. My final configuration has just IPv4 configured (deselect IPv6 – on by default) and in the adapter advanced configuration, all TCP offload settings set to disabled (all offload settings are on by default). You can tell if it’s not happy, it won’t connect to anything or it’ll blue screen. (Posts like this vaguely mention IPv4 only and disable offload…)


Nice post thanks. Any idea why they removed easy install to USB in version 6? 5.5 was so easy, just stick in the CD, choose the USB in the install target options, and away you go. Took me 15 minutes to install 2 servers to USB and pool them with 5.5 In hyper-v at my workplace, took 3 guys 1 week to get it up and clustered. With XenServer v6, takes an hour of googling and fiddling and manual editing of config files…why so hard? =(
Good question, I liked the USB option too.
Hi,
I try to reset my root password. I follow the tuto and after the mboot.c32 i put the single commande. After that i see information but it’s block on
“mounted filesystem with ordered data mode.”
and i don’t have the shell prompt. Do you have any idea?
Thank you
No, but perhaps some other reader can help…
Hi there,
I need help here.
I just need a comparison of ESxi Vmware and XenServer?
Which one would you recommend and use the most especially for production?
I am using ESXI and currently having a problem mounting USB flash or external drives on all VM machies.
Merci pour le tutoriel
J’ai ou trouver dans les recherches un site de tutoriel video très satisfaisant et complet. A tester 🙂 https://www.alphorm.com/formation/formation-citrix-xenserver-6-administration-a20